Create a Deployment
This step-by-step guide shows you how to create deployments for Docker and Helm applications in Distr. Before creating a deployment, make sure you’ve already created an application with at least one version. The deployment flow guides you through selecting a customer, choosing an application, configuring deployment settings, and obtaining the command to install both the Distr agent and your application.
Docker Deployment
Section titled “Docker Deployment”Step 1: Select Customer
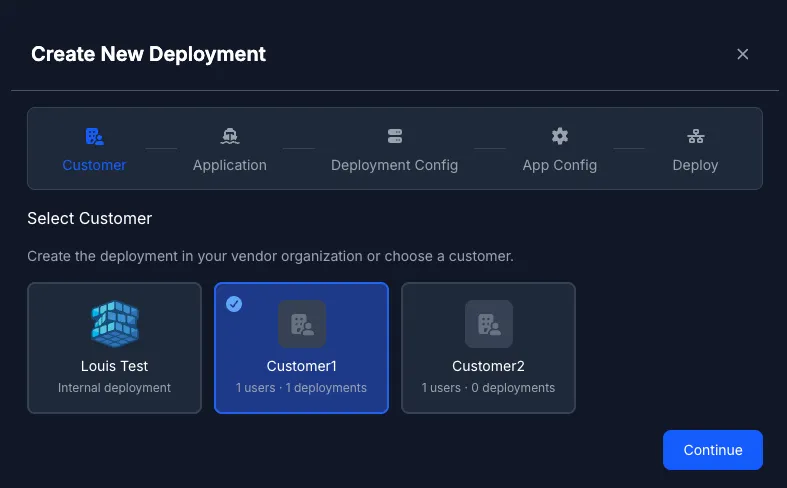
Section titled “Step 1: Select Customer”Navigate to Deployments under Agents in the sidebar and click on the + New Deployment button.
The first step is to select the customer organization that will receive this deployment. If you haven’t created any customers yet, you’ll need to do that first. See Onboarding a New Customer for instructions.
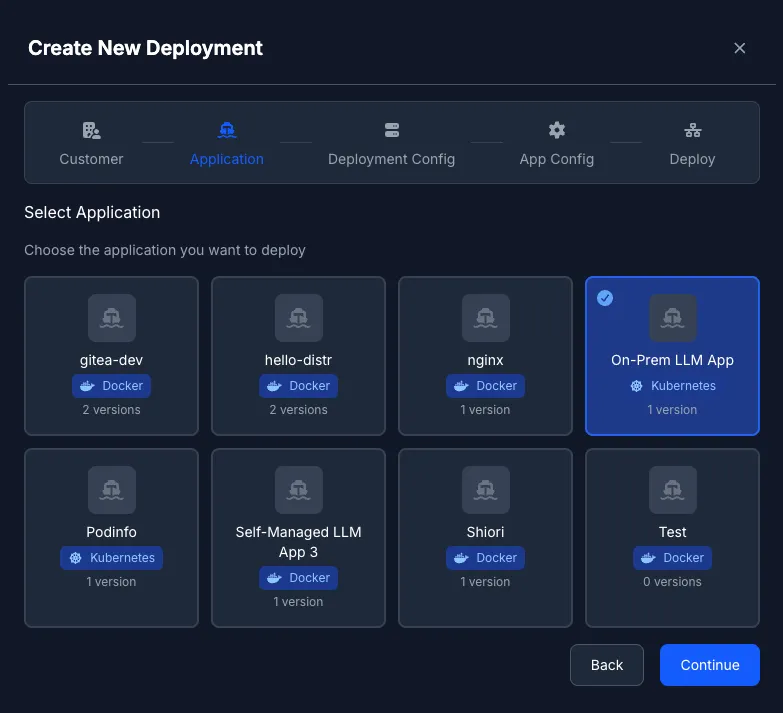
Step 2: Select Application
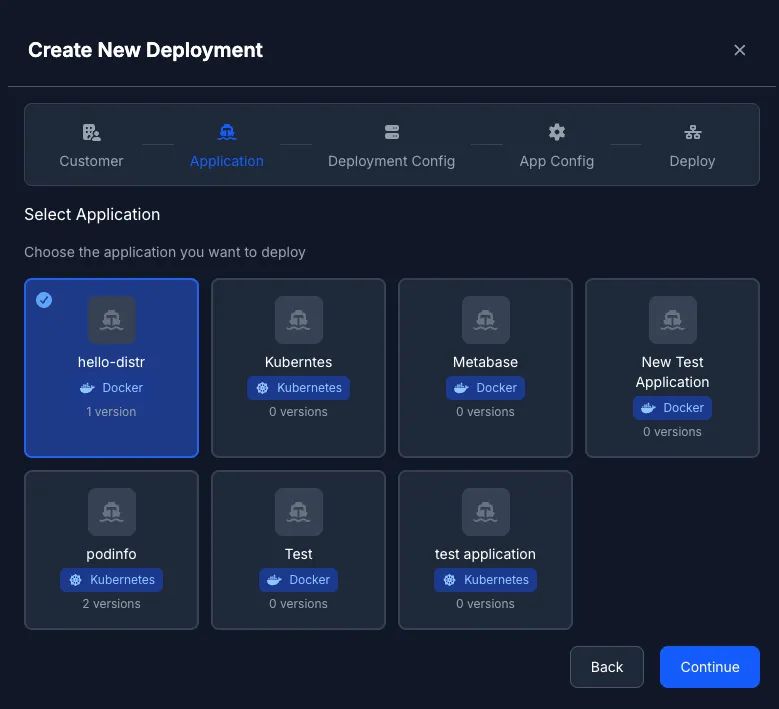
Section titled “Step 2: Select Application”After selecting a customer, choose the Docker application and version you want to deploy.
Step 3: Deployment Configuration
Section titled “Step 3: Deployment Configuration”Give your deployment a descriptive name. This name will help you identify and manage the deployment later.

Step 4: Application Configuration
Section titled “Step 4: Application Configuration”Configure the environment variables for your Docker Compose application. These variables will be passed to the docker compose process via the --env-file argument.
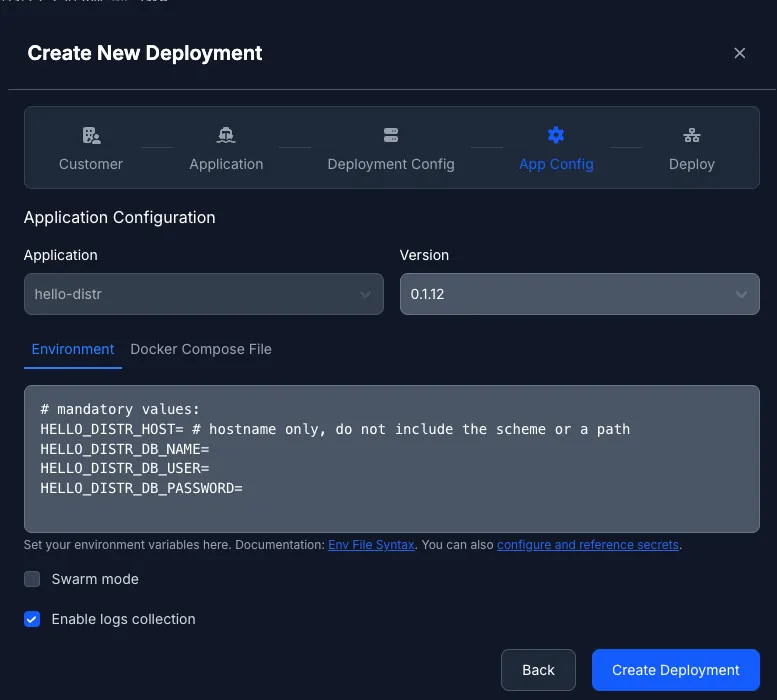
The entered environment variables will be passed unmodified to the docker compose process via the --env-file argument.
For more information on how to use them, please refer to our guide on working with environment variables.
You can also enable Docker Swarm mode for deployments that should run in swarm mode. See Docker Swarm for more details. Additionally, you can enable container log collection to view application logs directly in the portal. Learn more about Container Logs.
Step 5: Deploy
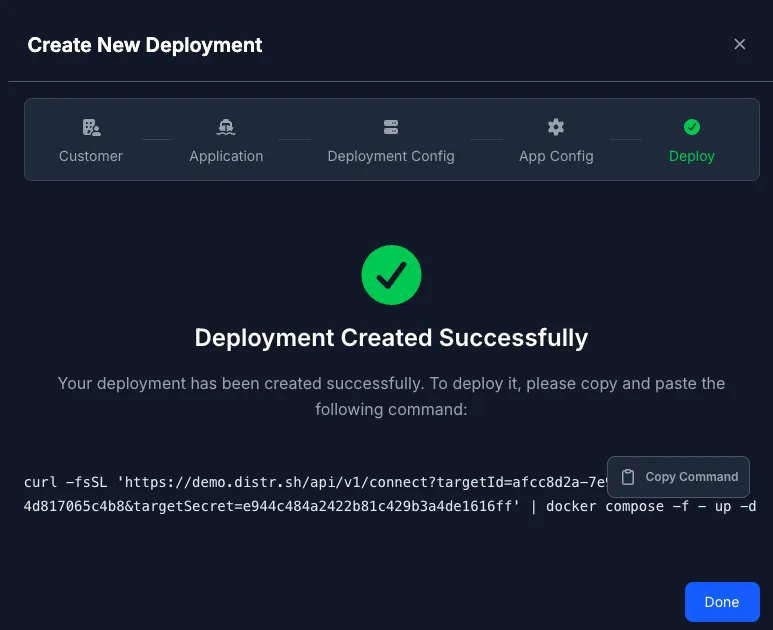
Section titled “Step 5: Deploy”Review your configuration and click Create Deployment to proceed to the deployment page.
Verifying Your Deployment was successful
Section titled “Verifying Your Deployment was successful”After running the command, you can check the deployment status in the Deployments section. Click on the Inspect button to view detailed status logs and monitor the deployment progress.
Helm Deployment
Section titled “Helm Deployment”Step 1: Select Customer
Section titled “Step 1: Select Customer”Navigate to Deployments under Agents in the sidebar and click on the + New Deployment button.
The first step is to select the customer organization that will receive this deployment. If you haven’t created any customers yet, you’ll need to do that first. See Onboarding a New Customer for instructions.
Step 2: Select Application
Section titled “Step 2: Select Application”After selecting a customer, choose the Helm application and version you want to deploy.
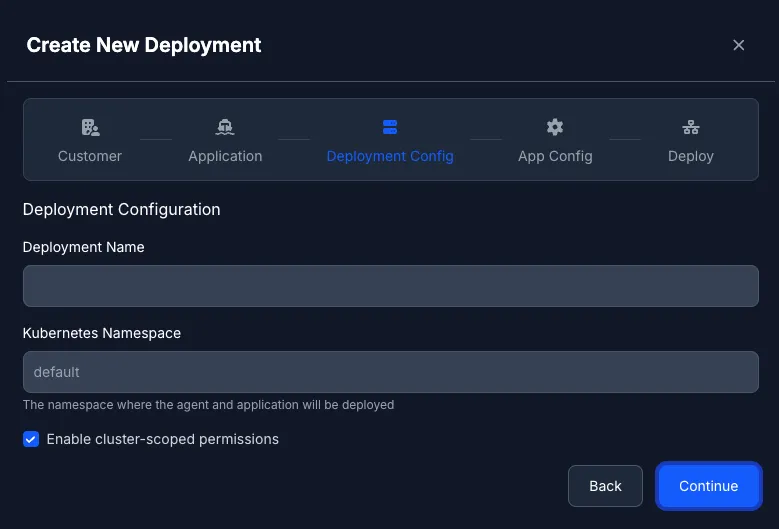
Step 3: Deployment Configuration
Section titled “Step 3: Deployment Configuration”Give your deployment a descriptive name and specify the Kubernetes namespace where it should be deployed. Make sure the namespace exists in your cluster before proceeding.
You can also enable cluster-scoped permissions. When enabled, the agent will have cluster-wide access; otherwise, it will be limited to a specific namespace. See Helm Agent for more details about cluster-scoped vs namespace-scoped agents.
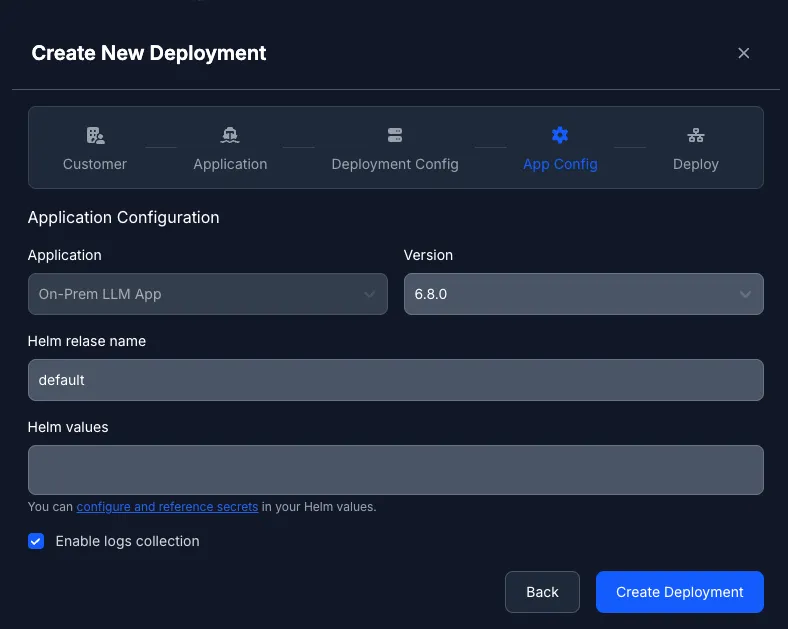
Step 4: Application Configuration
Section titled “Step 4: Application Configuration”Configure the Helm values for your application. You can adjust the values from the base values file you provided when creating the application version.
Step 5: Deploy
Section titled “Step 5: Deploy”Review your configuration and click Create Deployment to proceed to the deployment page.
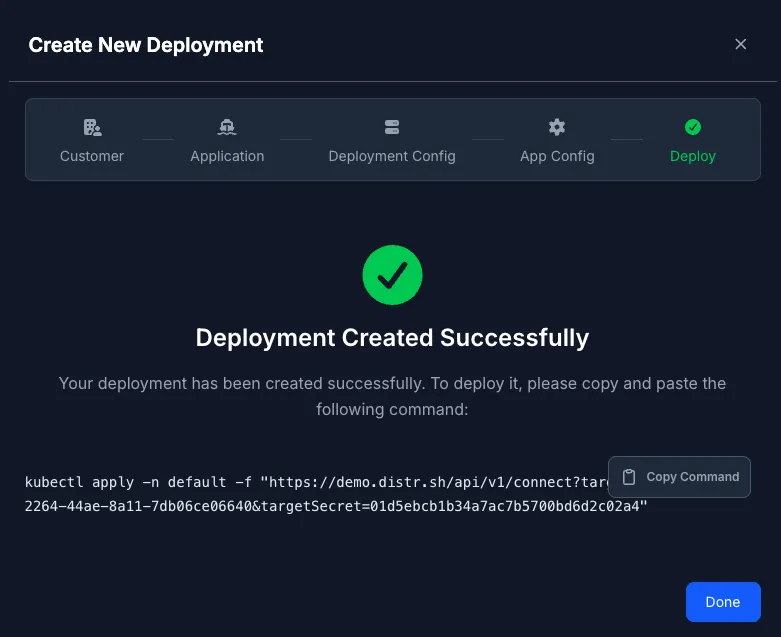
Verifying Your Deployment was successful
Section titled “Verifying Your Deployment was successful”After running the command, you can check the deployment status in the Deployments section. Click on the Inspect button to view detailed status logs and monitor the deployment progress.
Using Existing Deployment Targets
Section titled “Using Existing Deployment Targets”If you already have a deployment environment of type docker or kubernetes, you can use it to deploy your application.
Simply navigate to the Deployments section and click on the + Deploy App button next to the deployment target you want to use.
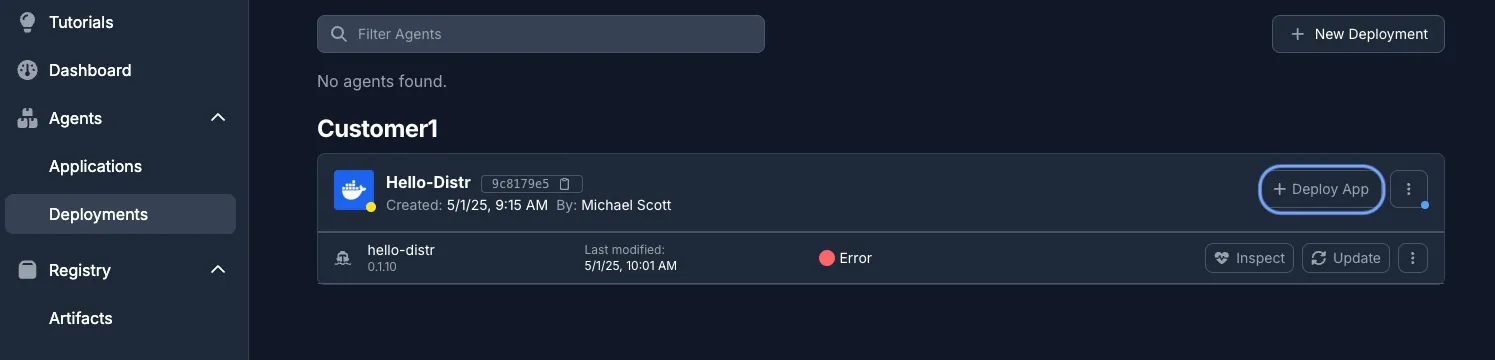
This will show you the same flow as above, where you can select your application and version to deploy, configure the deployment settings, and get the command to install both the agent and application.
Related Guides
Section titled “Related Guides”- Create a Application - Learn how to create Docker and Helm applications
- Application Licenses - Control which applications customers can access
- Docker Environment Variables - Configure environment variable templates
- Helm Chart Registry Auth - Set up authenticated image pulls