Customer Management
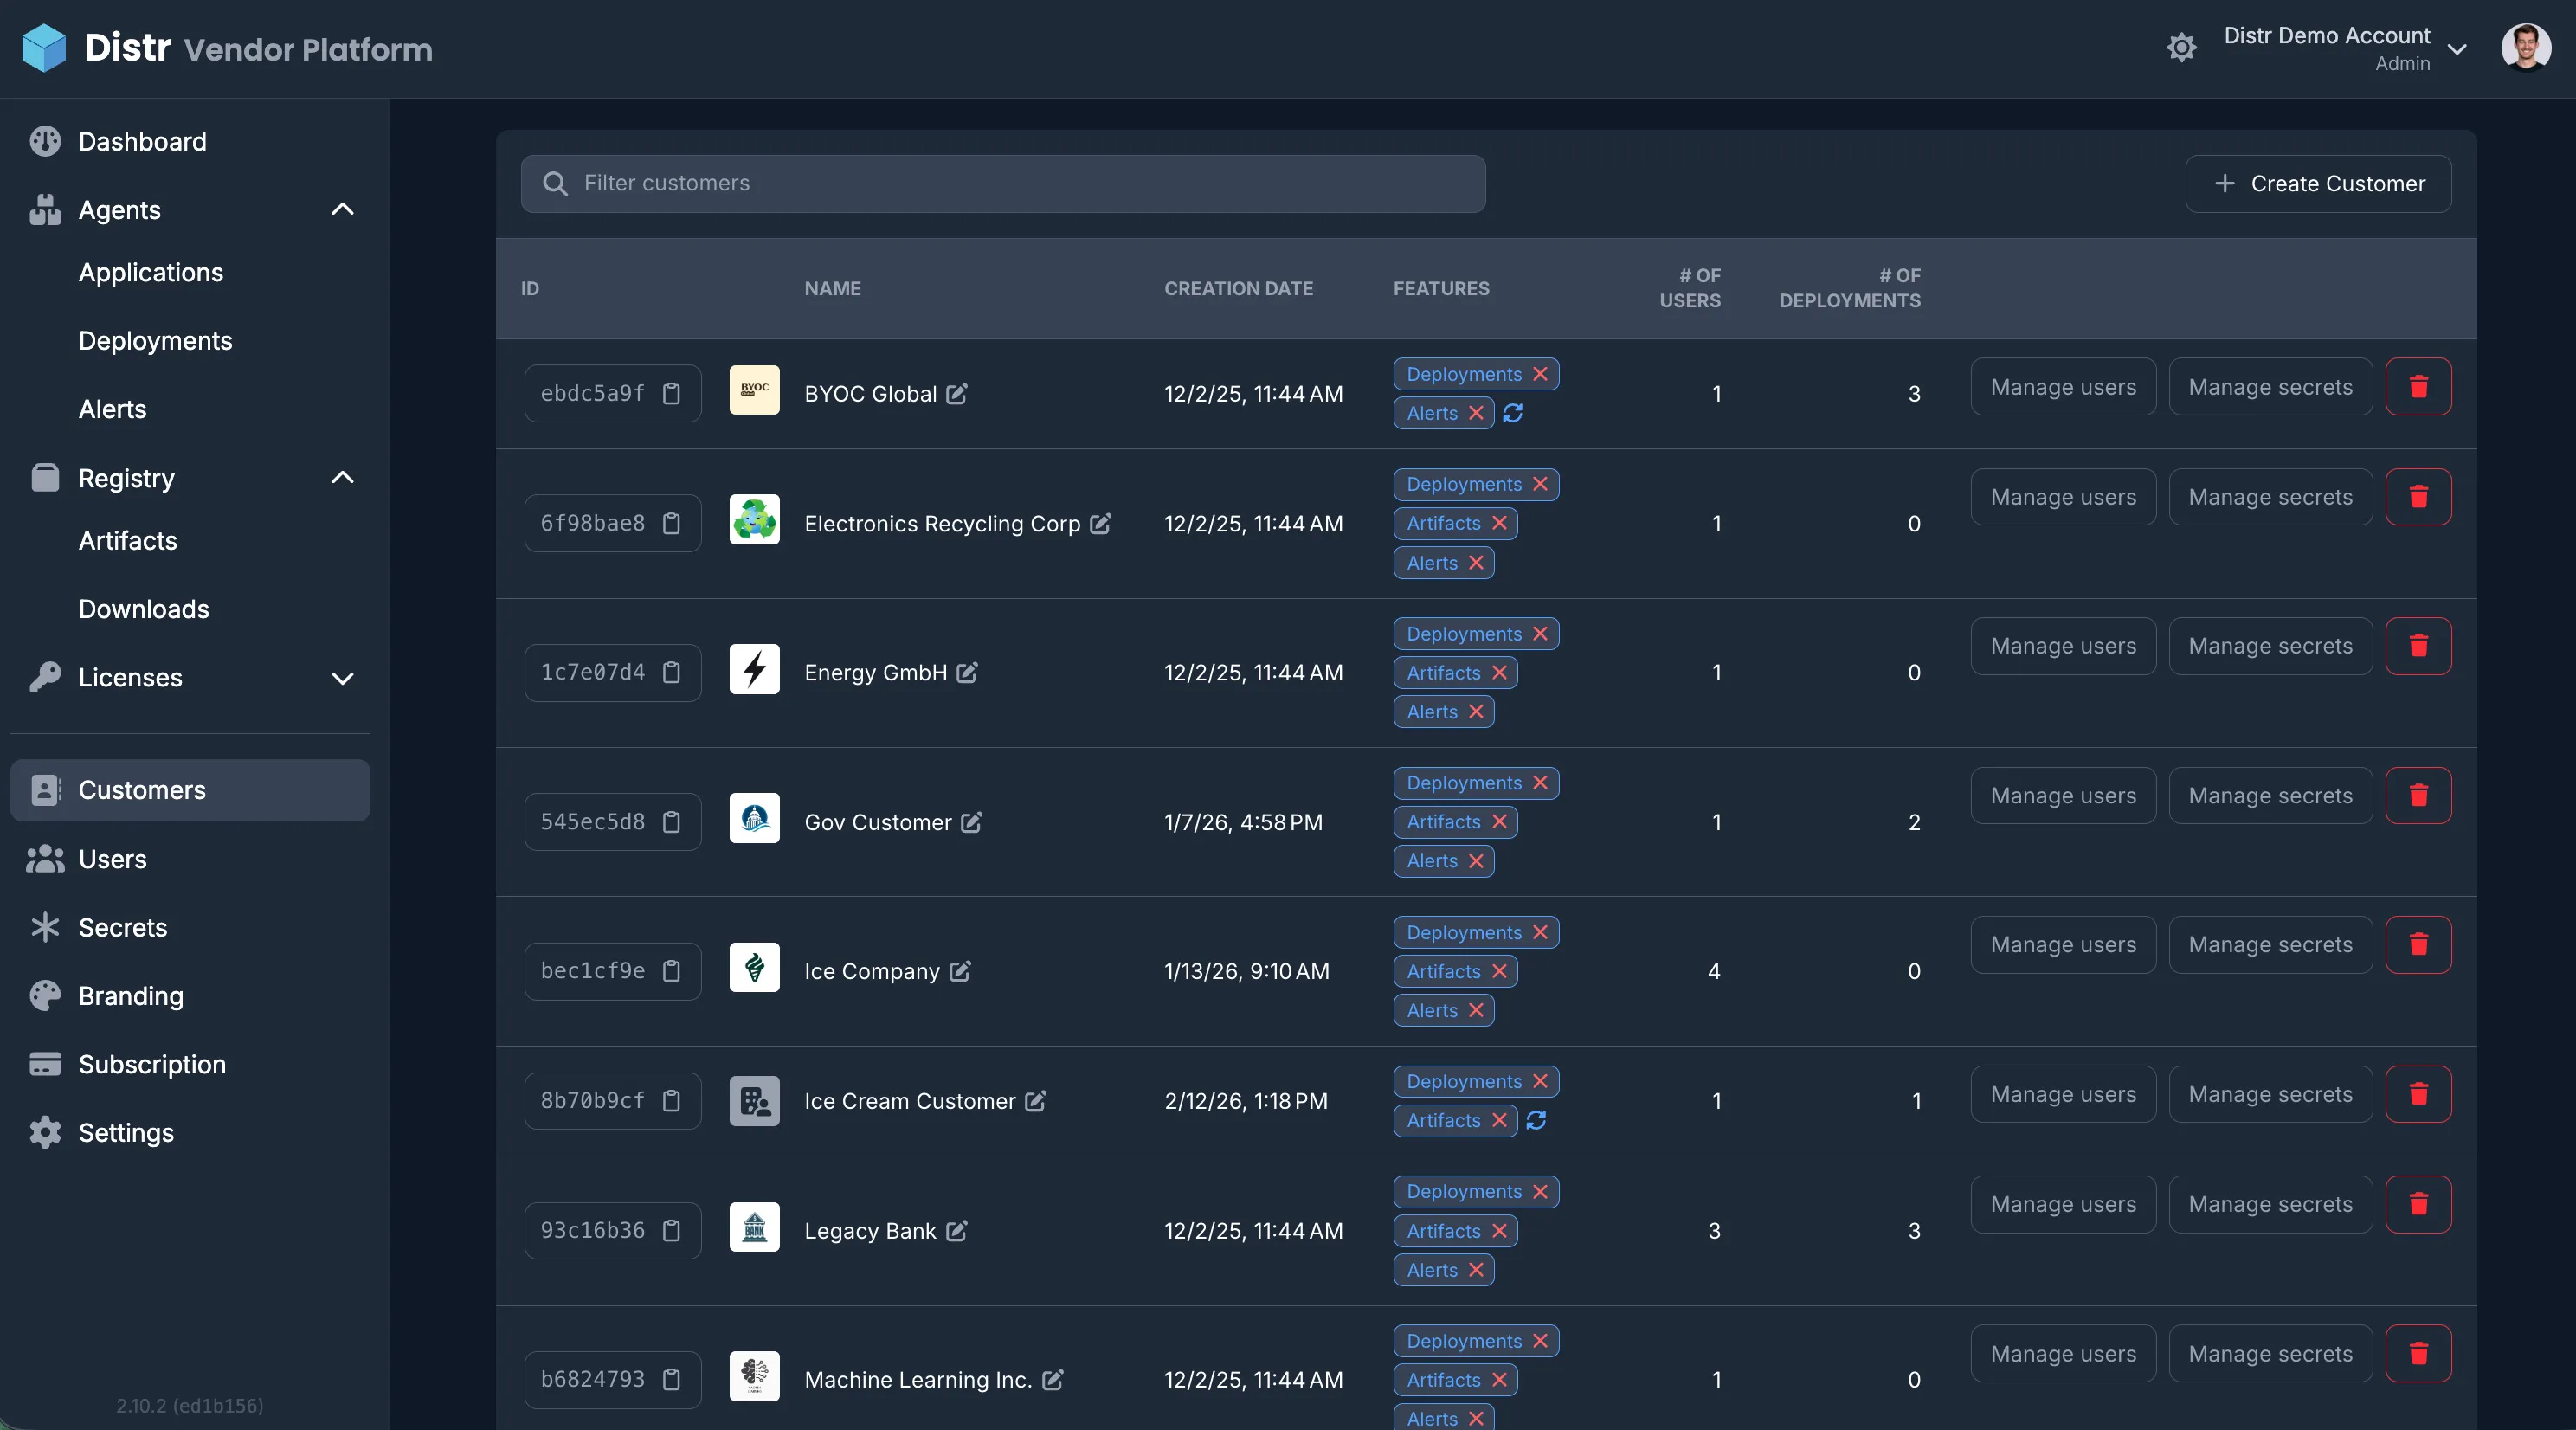
The Customers section in the Vendor Portal is where you create and manage customer accounts, invite customer users, manage customer-specific secrets, and control which features each customer can use. This guide walks you through the customer management interface and common tasks.
Overview
Section titled “Overview”From the Customers page you can:
- Create customers and give them a name
- Invite customer users (name, email, and role) and manage access per customer
- Manage secrets for a specific customer—see Manage Secrets for how secrets work
- Enable or disable features per customer: Deployments, Alerts, Artifacts, and Support Bundles
Use the Filter customers search bar to find customers, and + Create Customer to add a new one.
Creating a customer
Section titled “Creating a customer”- In the Vendor Portal sidebar, go to Customers.
- Click + Create Customer.
- Enter a name for the customer.
- Confirm to create the customer.
The new customer appears in the list. You can then invite users, manage secrets, and configure features for them.
Inviting customer users
Section titled “Inviting customer users”- In the Customers list, open the customer you want to add users to.
- Click Manage users for that customer.
- Click Add user (or Invite User).
- Enter name, email, and role (see RBAC for Administrator, User, and Viewer).
- Submit the invitation.
The invited user receives an email to set up their account. The first user for a customer is always an Administrator. After that, customer admins can add or remove users themselves from the Customer Portal.
Managing secrets per customer
Section titled “Managing secrets per customer”For each customer you can manage secrets that are only available to that customer’s deployments:
- In the Customers list, find the customer.
- Click Manage secrets for that customer.
For how to create, edit, and use secrets (including customer-specific secrets), see Manage Secrets.
Enabling and disabling features per customer
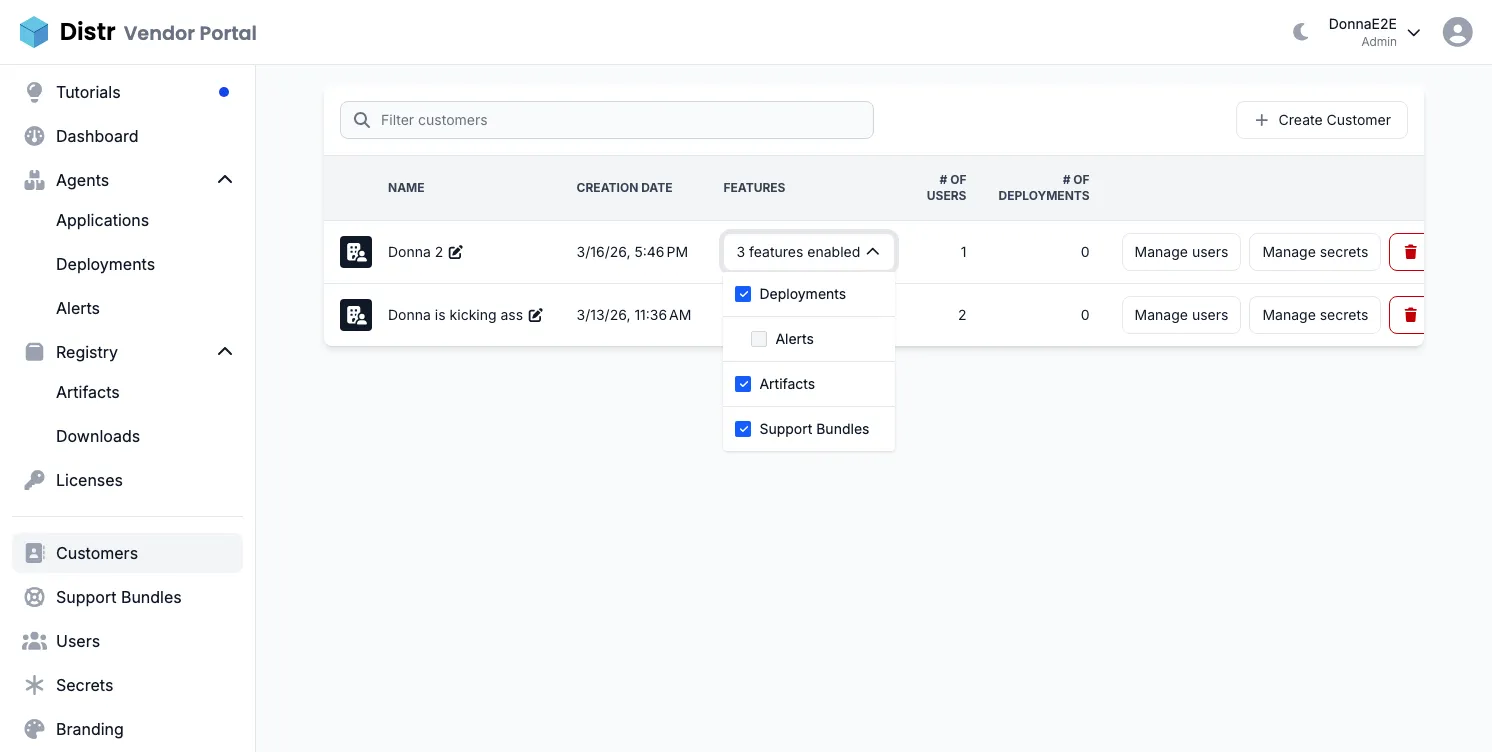
Section titled “Enabling and disabling features per customer”You can control which features are available to each customer organization. The available features are:
- Deployments: access to agent-based deployments
- Alerts: deployment health notifications (requires Deployments)
- Artifacts: access to the artifact registry
- Support Bundles: ability to create and submit diagnostic bundles
Each customer has a Features button in the customer list showing how many features are currently enabled. Click it to open a dropdown where you can check or uncheck individual features.
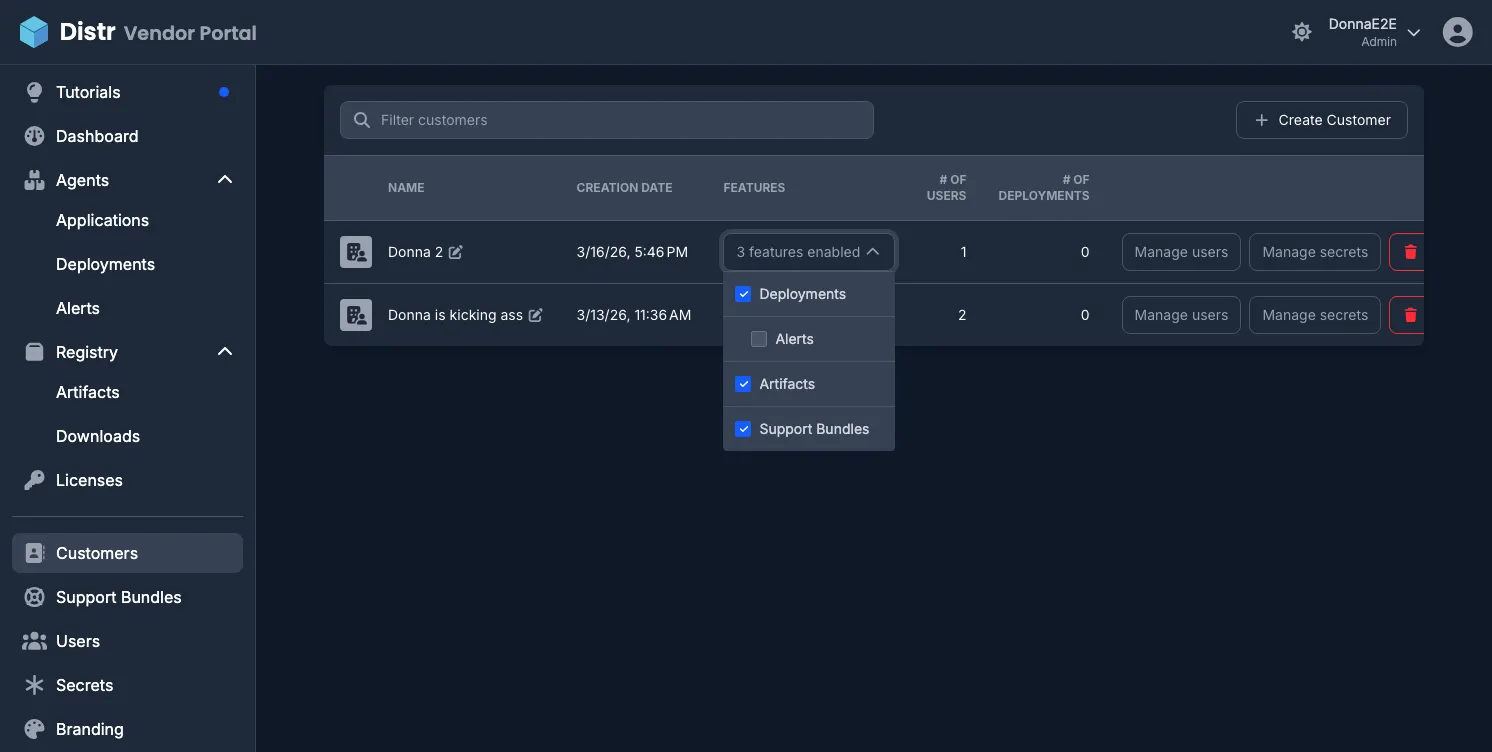
A few things to note:
- Alerts depends on Deployments. Enabling Alerts automatically enables Deployments; disabling Deployments automatically disables Alerts.
- Support Bundles and Artifacts are independent and can be toggled without affecting other features.
- Deployments and Artifacts are enabled by default for new customers. Alerts and Support Bundles must be explicitly enabled.
- Changes take effect immediately. Disabled features are hidden entirely from the customer in the Customer Portal. Customers only see the sections that are enabled for them.
Next steps: assign access with Application Entitlements or Artifact Entitlements, or learn the End-customer view of Distr.